Submission Instructions for PhilSci-Archive
[2007] LSE-Pitt Conference: Confirmation, Induction and Science
(London, 8 - 10 March, 2007)
The instructions below only detail the main steps of submitting a paper
to PhilSci-Archive.
General information regarding the archive, as well as instruction on
browsing, searching for a paper,
receiving email notifications, etc., can be found at http://philsci-archive.pitt.edu/help/.
Steps for submitting a paper:
1. Registering a User Profile.
This must only be done once, when first using PhilSci-Archive. (So skip this step if you already have an account.) To register, go to http://philsci-archive.pitt.edu/perl/set_password. You will be prompted for your email address, a password, and a user-name (see Fig I.). Once these are filled in, press the "Submit" button.
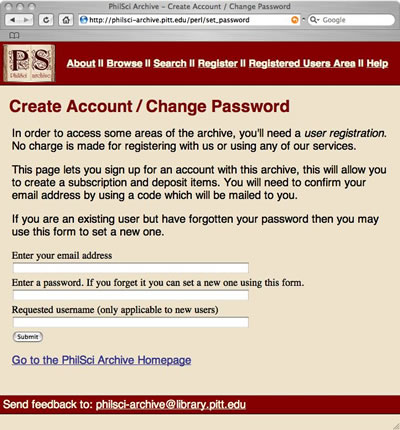
(Fig. I)
An email will be sent to your email address confirming your registration. To activate you account, follow the first URL in that email. To provide biographical information on yourself, follow the second URL in that email.
2. Submitting to PhilSci-Archive.
2.1. To submit a paper to PhilSci-Archive, go to http://philsci-archive.pitt.edu/perl/users/home.
You will be required to enter your username and password. For general
information on the options available on this page, see the Archive Help
Page, http://philsci-archive.pitt.edu/help/.
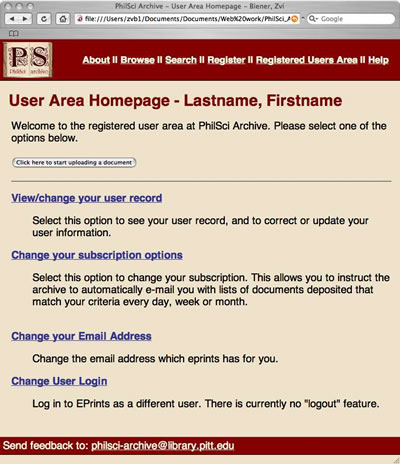
(Fig. II)
2.2 To submit a paper, click "Click here to start uploading a document". You will be asked for the type of paper you are depositing. Select "Conference Paper" and click "Next>" (See Fig. III).
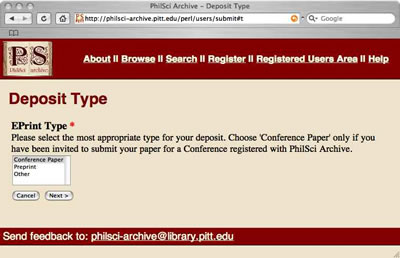
(Fig. III)
2.3 You will be asked whether the paper you are depositing in a later version or a commentary of a paper already deposited in the archive. For PSA submissions, you can leave the two fields blank and simply click "Next>" (See Fig. IV).
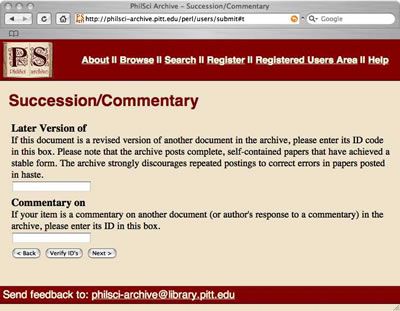
(Fig. IV)
2.4 You will now be asked to provide bibliographic information about your paper, including your name, the title of the paper, the abstract, the subject matter under which the paper should be categorized, and the conference with which it is affiliated. Please fill in as much of this information as possible – this makes it easier for other users to find your paper. In particular, in the "Conferences and Volumes" selection box, please select: "[2007] LSE-Pitt Conference: Confirmation, Induction and Science (London, 8-10 March, 2007)."
NB: In order to highlight more than one item in a selection box (e.g., the "Subjects" box), press the "Control" key on a Windows machine or the "Apple" key on a Mac on your keyboard while using the mouse to highlight.
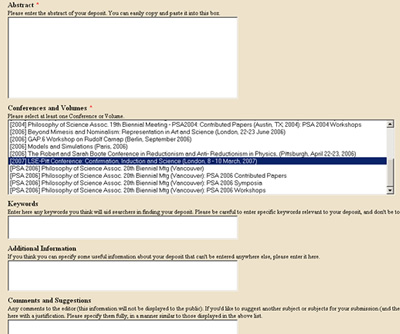
(Fig. V – Please select the "[2007] LSE-Pitt Conference" entry as above).
When finished entering information, click "Next>" at the bottom of the page.
2.5 In the following screen, press the "Add Document" button (See Fig. VI).
(Fig. V)
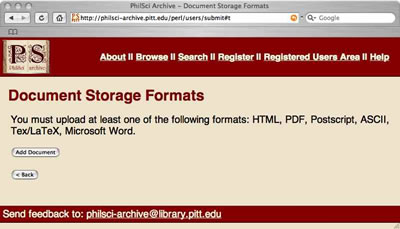
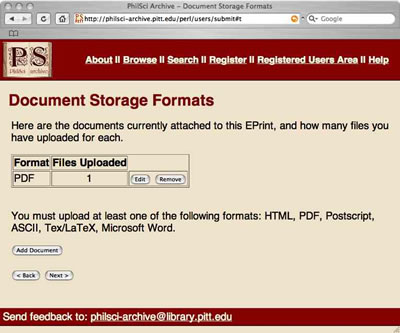
2.6 Please select the format of the file you will be uploading and hit "Next>" (Fig. VI).
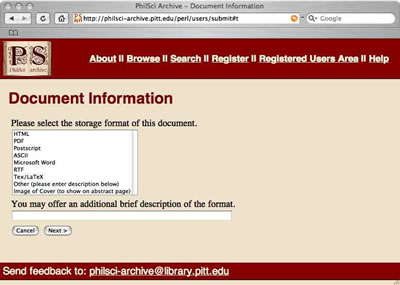
(Fig. VI)
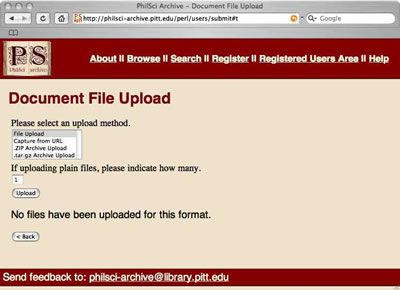
2.7 Almost done! In the "Document File Upload" page, click the "Upload" button. You need not worry about the upload method selection box, it will be automatically selected to "File Upload" (Fig. VII).
(Fig VII)
2.8 In the subsequent page, press the "Browse…" button. A navigation window will open. Use this window to find (on your own computer) the file you wish to upload, and press the "Open" button. Once you have done this, the file name will appear inside the textbox on the original page (see Fig. VII).
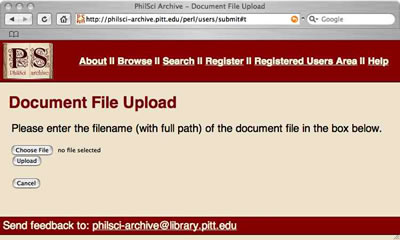
(Fig. VIII)
Press the "Upload" button. Your file will now upload. When
the upload is finished you will see the name of your file and its size
within the same window. Fig. IX shows this with the PSA 2004 Program
file.
(Fig IX)
If your file uploaded successfully, press "Finished>".
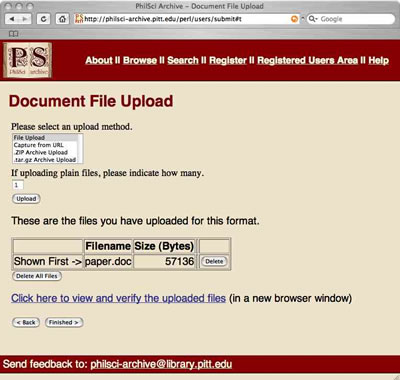
2.9 In the subsequent screen, you'll see another representation of the file you have uploaded (Fig. X).
(Fig X)
If you have accidentally uploaded the wrong file, press the "Remove" button and start the upload procedure again. If your paper is divided into several files (say, a text document and a document containing images), you can upload additional files by pressing the "Add Document" button and repeating the upload procedure. If you are content with the file you have already uploaded, press the "Next>" button.
2.10 You will now see a page summarizing your submission’s bibliographical information. If you are content with it, press the "Deposit EPrint Now" button at the bottom of the page. You are now done. The paper will take no longer than 48 hours to appear in the archive. If you are not content with it, hit "Deposit EPrint later".
2.11 If you selected "Deposit EPrint later" on the previous screen, you will be taken back to your User Area Homepage. You will see the name of you paper listed below the heading "Documents in your Workspace". In order to edit the paper’s bibliographical information or upload a different file, press the "Edit" button. In order to submit the paper to the archive as-is, press the "Deposit" button (See Fig. XI).
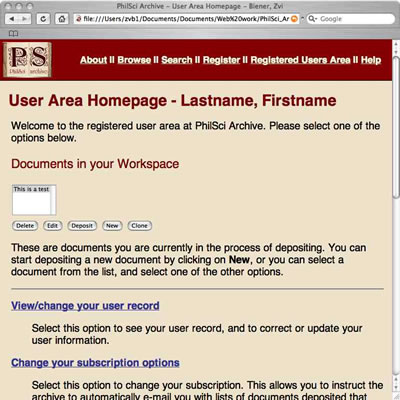
(Fig. XI)
Once you have pressed the "Deposit" button, you are done. The paper will take no longer than 48 hours to appear in the archive.